VERSION 1.013/1.014 UPDATES
Download ReadMe Pages as PDF
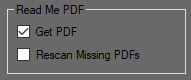
Download Product Data now includes download of your products’ ReadMe Pages, stored in PDF
format. Just check the Get PDF box to download or include these:
Rescan Missing PDFs:
Some products do not have a ReadMe Page in which case they will return a ReadMe Page does not
exist or is temporarily unavailable error when you try to download them. In that case a “nr” file will be
placed in the ReadMe (“rm”) folder as a flag indicating that the page does not exist on the DAZ server.
This tells the program to ignore that page next time you scan for files, to avoid wasting time and
resources on retrying downloading non-existing pages.
Sometimes however a missing ReadMe Page can be an error, or it hasn’t been added yet, so it may
return / be added later. If the Rescan Missing PDFs box is checked the program will retry
downloading all the pages flagged as non-existing, for the products selected for download, to get any
that have returned or have been added since the last failed attempt to get them. You can click the
ReadMe Online button to check if the product selected on the main product list currently has an
online ReadMe page.
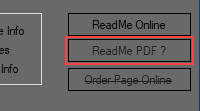
Opening ReadMe PDFs:
To open a product’s ReadMe PDF (using the default PDF viewer on your system) first select the product
on the main product list, then cli
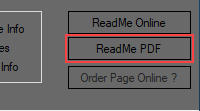
ck the ReadMe PDF button in the lower right corner of the program
window. This button changes appearance dynamically, according to the status of the selected
product’s ReadMe PDF:
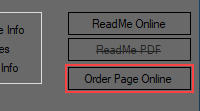
Offline PDF exists (button enabled, normal text):
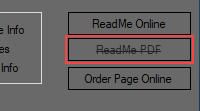
Offline PDF does not exist (download attempted but ReadMe file not available online):
(button disabled, text greyed out and striked out):
Status unknown (no download attempt yet): (button disabled, text greyed out, with question
mark):
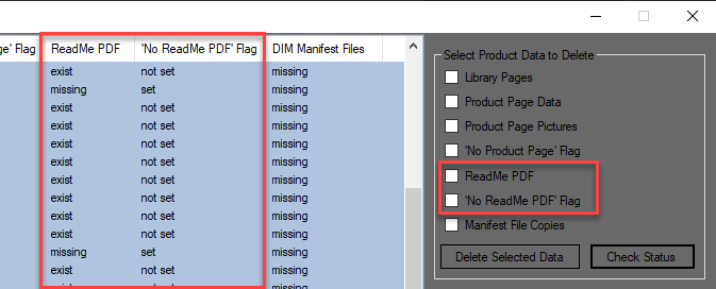
The Product Data Manager has likewise been updated to include the ReadMe PDF and -flag files:
Locate Products in DS - support for Legacy versions of DS
Locate Products in DS (see this page for more info) now also supports DS versions earlier than
4.12.1.117. By default this feature actually works for these versions also, it will however start a new
instance of DS whenever you click a Content Library path which makes it useless in practice. A
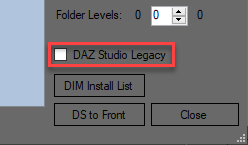
workaround has now been made however, which prevents new instances from starting. To enable it,
check the “DAZ Studio Legacy” checkbox on the Locate Products in DS window (setting will be saved
when changed):
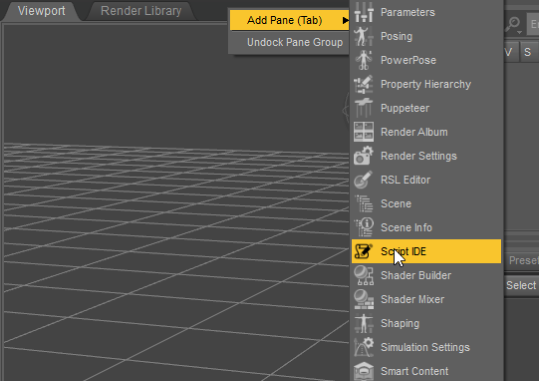
The workaround involves the Script IDE which must be enabled. To enable it, right click a Pane Group,
select “Add Pane (Tab)” and then “Script IDE”:
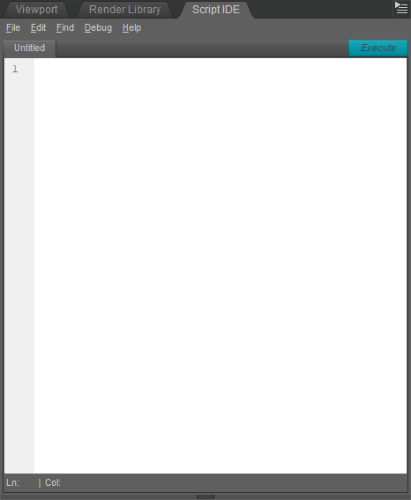
You should now see this:
Now right click on an installed product on the main product list in the DAZ Product Manager and select
“Locate Selected Product in DAZ Studio” from the context menu to open the Locate Products in DS
window, and click on a path in the left pane. You should now see a file “dp.dsa” in the DAZ Product
Manager’s “bin” folder:
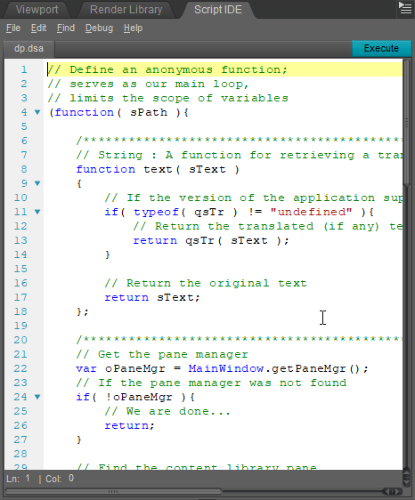
Drag the “dp.dsa” file onto the Script IDE in DS (or open it via the Script IDE’s File menu). You should
now see the script in the IDE Window:
Now click the “Execute” button on the Script IDE Window (or press F5) and the DS Content Library
should now jump to the path you selected in DAZ Product Manager
Next time you click on a library path in DAZ Product Manager, the script on the disk will be updated
with the new path. To update the script in the Script IDE in DS, select “Reload Script” from the Script
IDE’s File menu. Then click the Execute button to run it. Repeat this every time you want to locate a
new path.
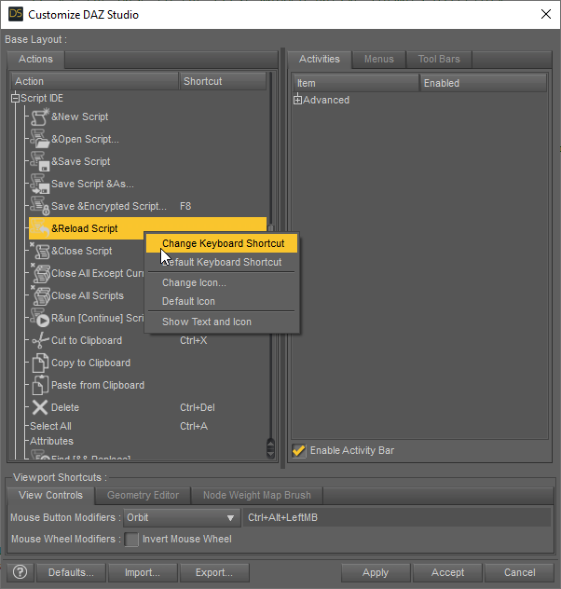
To make things easier you can assign a keyboard shortcut to the “Reload Script” function. Open the
"Customize DAZ Studio" window (Window > Workspace > Customize (or press F3)) and find the Script
IDE menu. Right click on "Reload Script" and select "Change Keyboard Shortcut", it will then ask you
to enter a key sequence. F6 is normally unused in DS, so if you choose that you just have to hit F6 and
then F5 to update and execute the script:
This method using the Script IDE has also been tested and used with a Mac version of DS, on a Mac
with a virtual Windows 10 with DS installed. It just requires that the “dp.dsa” script can be shared
between the MacOS and Windows via the file system. You then select the library path in the DS in
Windows, and then shift to the Mac version of DS where the script is loaded, and reload/execute the
script there.

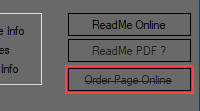
View Order Pages Online
This feature has now been updated and re-enabled. Click the Order Page Online button to acces the
order page for the selected product online.
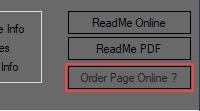
The button changes appearance dynamically, according to whether the Order Page can be accessed or
not which depends on the status of the product’s Order Number data:
Page exists and is accessible (button enabled, normal text):
Product has no order number/page, e.g. products imported from RDNA: (button disabled, text
greyed out and striked out):
Status unknown (product’s Product Library data not downloaded yet): (button disabled, text
greyed out, with question mark):
Viewing Order Pages online requires browser login, if you’re not logged in the Login Box will pop up
first, or, if you already have logged in to “Download History” or “Download Product Data” earlier, the
browser will just log in automatically when you click the “Order Page Online” button.
Changes to Product Data Handling
Product Data are collected in two stages from two separate data sources in your account:
1. “Download History” gets a list of Product Names and SKUs for your your current products, adding
any new products as well as removing any returned products so it is in sync with the product list in
your DAZ account as well as with DIM and DazCentral.
2. “Download Product Data” will download additional product data (Order Date, Order #, Bundle, DIM
and Interactive License info) to complete the data.
It’s highly recommended to download Product Data for any new products after a History Download, so
all data for all products always are complete and up to date, as some of the functions in the program
like search on Order Date and -Number as well as looking up Order Pages depend on these data.
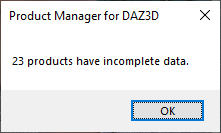
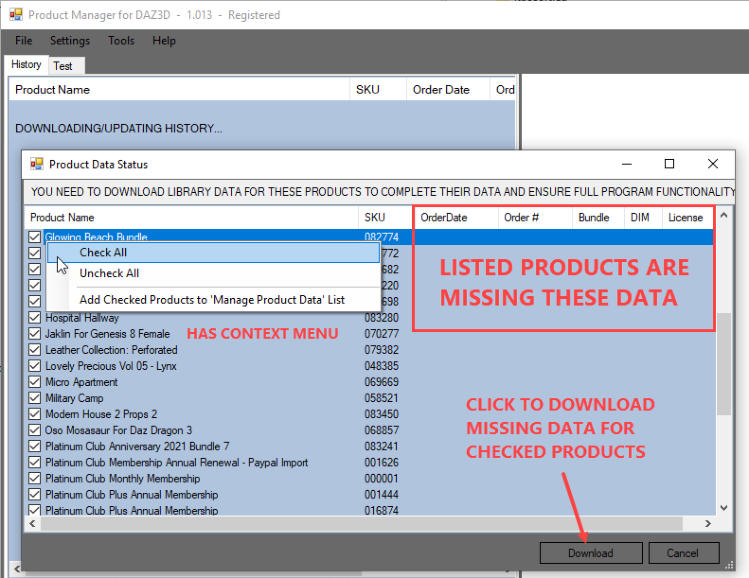
From version 1.013 the new Product Data Status window therefore will notify you if there are
products with incomplete data whenever the main product list is loaded, prompting you to download
the missing data before you continue. It’s recommended to download all data immediately but
otherwise you can select only those you want to download for now, using the checkboxes. Then click
the Download button to open the Product Data Download Manager:
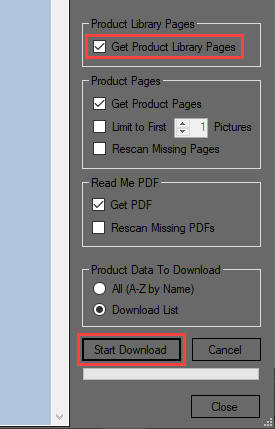
In the Product Data Download Manager you can uncheck Get Product Pages and Get PDF if you
want, to skip download of these, but Get Product Library Pages must be checked in order to get the
missing data. Then click the Start Download button to download the missing data:
When all data have been downloaded click the Close button and the Product List will automatically
update to reflect ny changes.
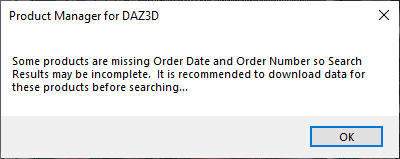
You can Cancel download both from the Product Data Status and the Download Manager
windows if you want to download the missing data later for some reason, but as long as there are
incomplete data you will get warning messages about missing data whenever the product list is
updated:
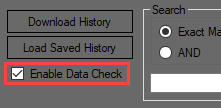
You can however disable these messages temporarily if you want by unchecking the Enable Data
Check button on the left bottom corner of the program’s main window:
History Snapshots
If there are changes after a History Download followed by a download of all new Product Data if any,
so that data for all products are complete, the program will create a History Snapshot. This is a file
containing an exact copy of all the current data on the file list.
If you have enabled Automatic Database Backup (select Tools > Backup from main menu), both the
complete database and the latest History Snapshot will be backed up.
The History Snapshot files are located in the “his” folder. They can be used for different things like
comparing product data from different points in time to check if products have disappeared from your
account, as well as for restoring a corrupt or missing database, if all else should fail.
NOTE: a bug in versions 1.012 and earlier is causing these versions to create redundant snapshots
with either the same data or with incomplete product data. If you have been using any of these
versions it is recommended to use the History File Cleaner, which will remove any redundant and
incomplete history files. In any case you must use it before using the new History File Comparer,
otherwise it may delete valid files that should not be deleted. You can find instructions for how to use
both these tools using this weblink:
History File Comparer
Hide Irrelevant Items
Some accounts have items on the History List that are not actual content products and which have no
Product Library data, like Platinum Club Subscriptions, Gift Cards, etc.. These are irrelevant for
normal program functionality, and the missing data in their product data fields may, because of
changes in program functionality in version 1.013/1.014, unnecessarily trigger certain functions and
error messages related to missing product data.
To check for such items and hide them if you have any, you should first download Product Library data
for all your products, otherwise it can be difficult to find the irrelevant items among all the actual
products.
1. first do a history download (click Download History button). If the Product Data Status
window pops up listing products with missing data, make sure to download at least the Product
Library Pages for everything on the list before proceeding. If there are any irrelevant items they will
be on the download list but return errors when the program attempts to download them, that’s normal
so just ignore it.
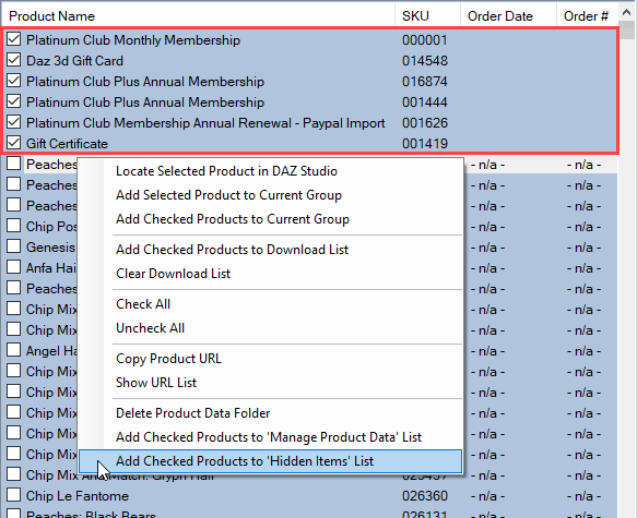
2. after the product list has updated, click the Order Date header to sort by Order Date. You should
now see any irrelevant items on top of the list, with empty Order Date and other fields. It may be Gift
Cards, Platinum Club Memberships and things like that. If you don’t have any at all, you don’t need
to do anything further. If you do however, check the checkboxes for these items as shown here:
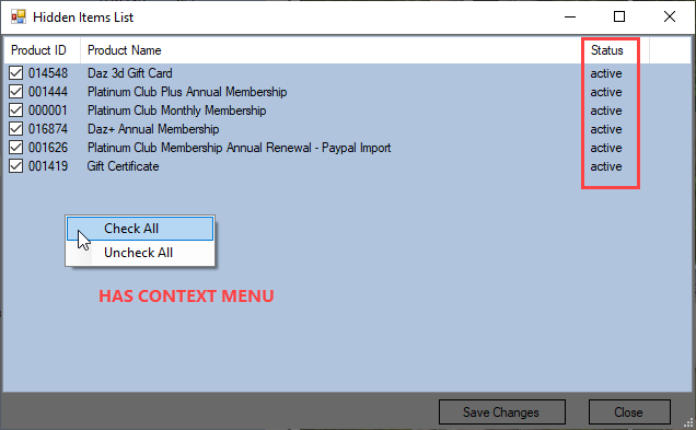
3. right click anywhere on the list to open the context menu, and select Add Checked Products to
‘Hidden Items’ List, as shown above. The Hidden Items List window will now open, listing the
selected products with Status “active”:
4. click the Save Changes button, they should now all change Status to “hidden”.
5. click Download History once again to update the product list with the changes, and sort by Order
Date. You should now no longer see any items with empty data fields on top of the product list or
have the Product Data Status window and other messages pop up whenever you update the product
list.
You can add normal products to the Hidden Items List also but it’s not recommended, as each item
that is added will slow down updating when doing a History Download. In any case, be sure to first
download all Product Page data you want to keep for products you want to hide, before hiding them,
in case they should be removed from the store. When hiding products their existing data will be
preserved except Library Data, which will be deleted when you hide the products.
To edit the Hidden Items List either add new items to the list as shown earlier, or select Tools >
Manage Hidden Items from the main menu. If you add new items they will have “active” Status
while existing items on the list will have “hidden” status.
When you click Save Changes any item that has its checkbox checked will be or remain “hidden”,
while any that isn’t checked will be removed from the list and become or remain “active”. After
clicking Save Changes the list will update to show what’s currently hidden. Click Close when editing
is finished and then Download History to update the product list.
Note that the Save Changes button will be blocked unless you have added new items or edited
existing items (changed their checkbox state).
Restoring Hidden Products
To restore (unhide) hidden products plus their Product Library data:
1. uncheck the Enable Data Check box.
2. select Tools > Manage Hidden Items, uncheck the checkboxes for the products you want to
restore, then click Save Changes and close the window.
3. click Download History to update the product list.
4. sort by Order Date and all restored products should now show on top of the list, with incomplete
data.
5. check the checkboxes for the restored items, then right click and select Add Checked Products to
‘Manage Product Data’ List as well as Add Checked Products to Download List from the context
menu.
6. select Tools > Manage Product Data from the main menu to open the Product Data Manager.
7. under Select Product Data to Delete check the Library Pages box, and click the Delete
Selected Data button. When finished, close the window and click “Yes” to “clear ‘Manage Product
Data’ list”.
8. select Tools > Download Product Data to open the Download Manager. Make sure that Get
Product Library Pages and Download List are checked, other settings are optional. Click Start
Download to re-download Library Pages, then close window when finished. Library Pages for the
products have now been re-downloaded and missing product data have been restored after the
product list has updated.
Fixed:
- login error if email address contained special characters.
- if Required Product was not “(owned)” URL link text would include and underline all or part of the
following text on product data page.
- would always create a History Snapshot File after "Download History" as well as after “Download
Product Data”, which in some cases would result in file data being incomplete (Order Date etc.
missing) for newly purchased products, as well as in duplicate identical History files being created.
This has now been fixed so it’s only possible to create History Snapshots when Product Data have
been added or changed, and all data are updated and complete. See more about History Snapshots
below.
Version 1.014 includes some minor bug fixes and improvements.
Known problems:
When logging in with the browser to View Order Pages Online, it may not go to the selected
product’s order page after having logged in but just keep showing the login page. In this case, just
select a different product and try to view its order page instead, after that things should work
normally.
Changes to Browser Functionality
If the browser needs to log in, e.g. to access Order Pages, it will now either do so automatically, or
the login box will pop up (see below).
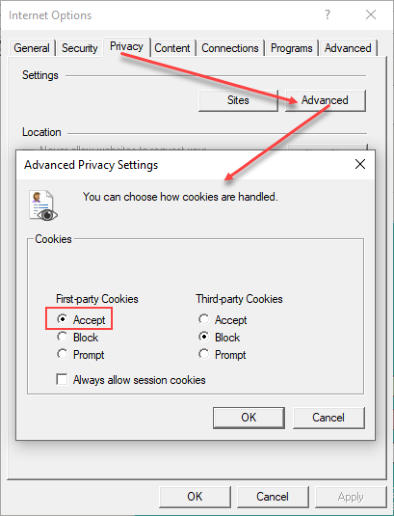
If the browser doesn’t log in when it’s supposed to, it is probably because the IE (Internet
Explorer) on your system is blocking First-party Cookies (the browser is a clone of the IE on your
system and inherits its settings). To enable login to your DAZ account, open IE, and select Tools >
Internet Options from the menu (press Alt to show the menu if it’s hidden). Then set it to accept
First-party Cookies:
Using this setting the browser will save a login cookie when you log in to DAZ so you won’t have to
log in during future sessions. This also means that anyone opening the program will be able to
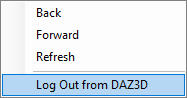
access your DAZ account via the browser. If you want to avoid that for security reasons, you can
log out from your DAZ account before exiting the program by right clicking the browser window
and select “Log Out from DAZ3D” from the context menu:
Note that Browser Login is completely separate from and independent of “Download History” /
“Download Product Page” logins and does not share cookies or anything with these, they just use
the same Login Box and user name / password for logging in.
As said earlier the built-in browser is currently based on the IE browser on your system, however
IE is no longer fully supported by the DAZ Store. You can still view the Order Page and use Print
Order / Print Invoice, but the Product Library no longer supports IE so you can’t download product
files or view Product Library pages via the buttons/links on the Order Page. The DIM “Download &
Install” buttons for both individual files and complete orders are still working though.
An update to Microsofts new Chromium/Edge based WebView browser is planned but it may take a
while as it is still in beta and doesn’t support a number of necessary features yet.